tiistai 30. joulukuuta 2014

An armrest bevel ready - and a new guitar coming up!

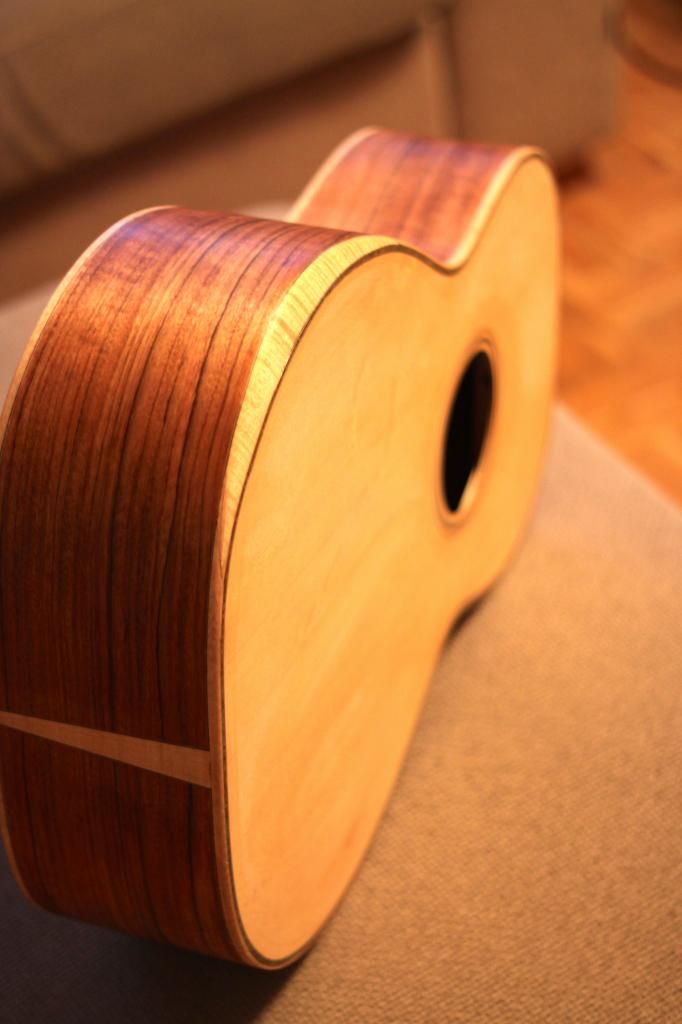
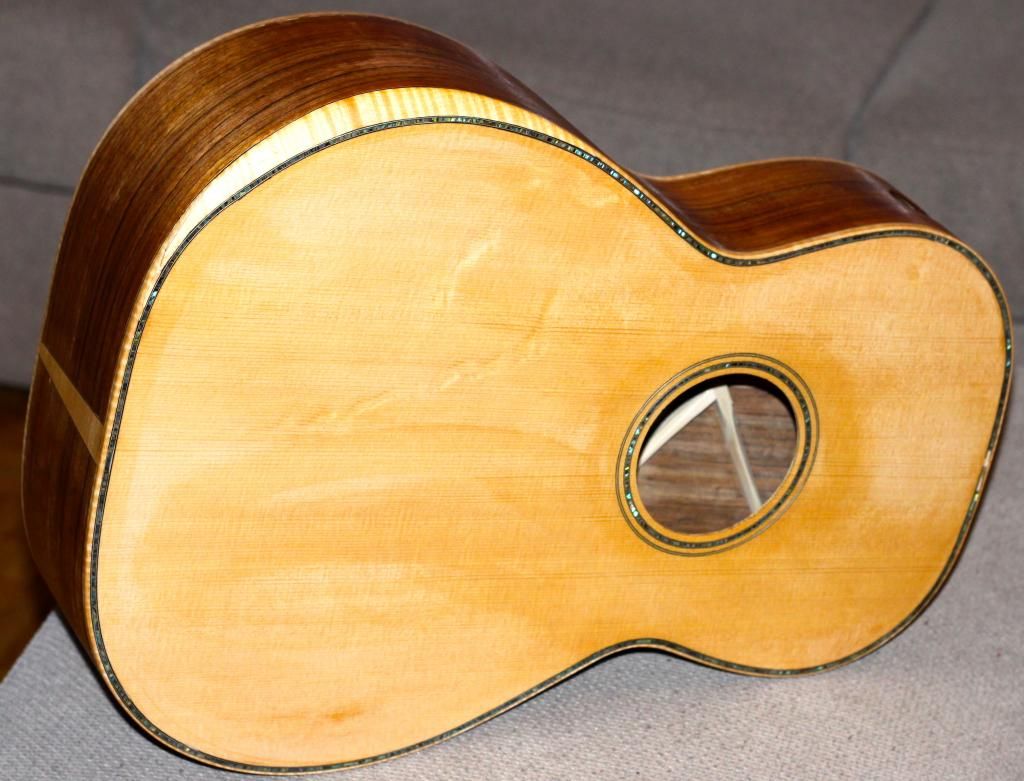
I've been building this H-13 style small bodied 13-fret guitar for myself every now and then for quite some time now. In december I finally got myself to shave the top braces and put the soundbox together. With narrow Zipflex green abalone purfling and maple binding this little guitar is starting to look pretty and classy. The top is Lutz spruce (with only partial bear claw but extremely high quality and nice silking all over the place), back and sides Ovankol with a nice mild figure.

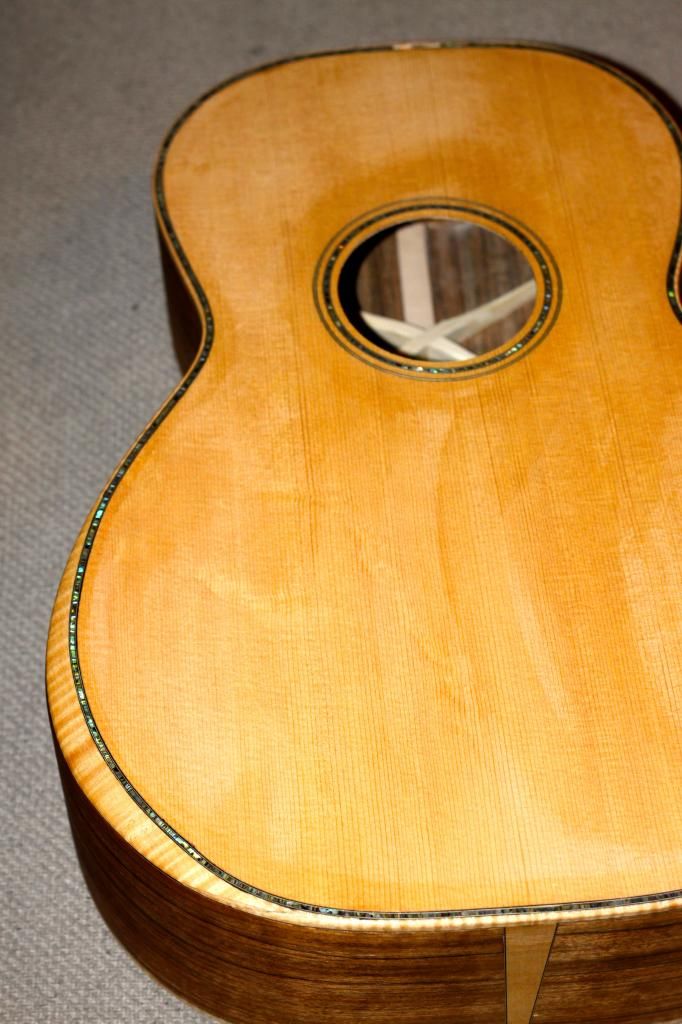
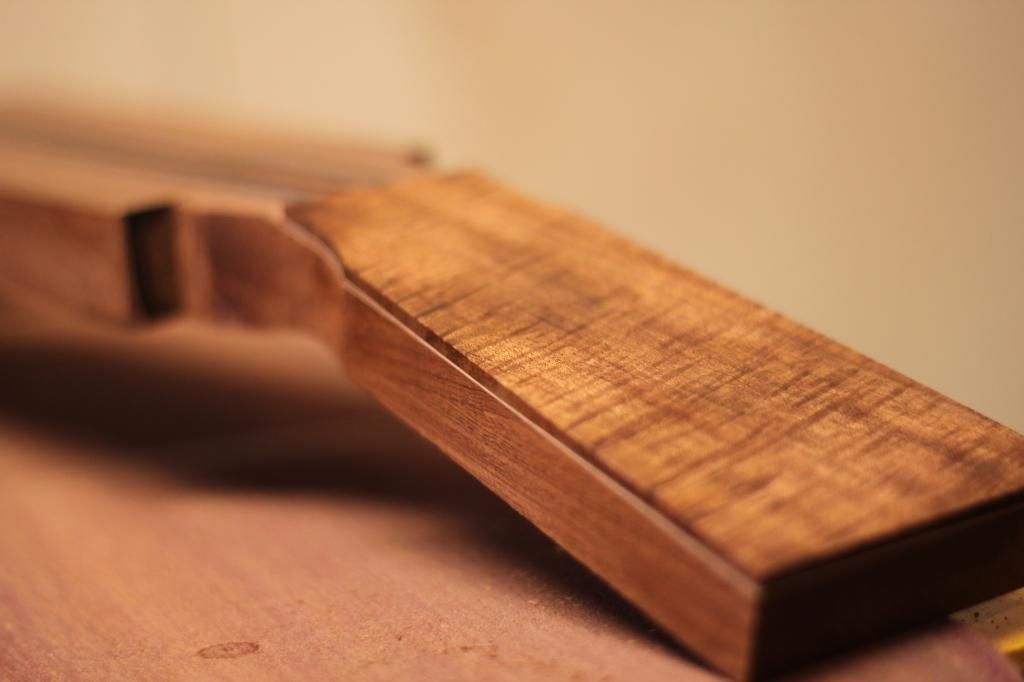
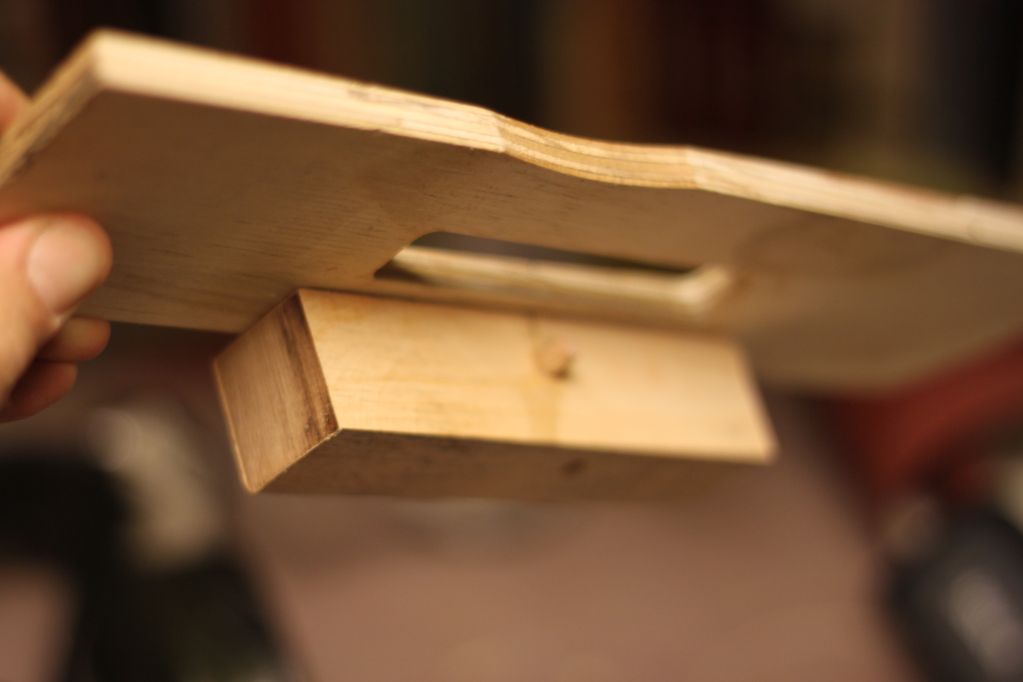
The armrest bevel adds quite substantially to the comfort of the guitar, but it's a pain to make. This was my second one, and I might have found a pretty good way to install the 3mm thick maple veneer in its place.
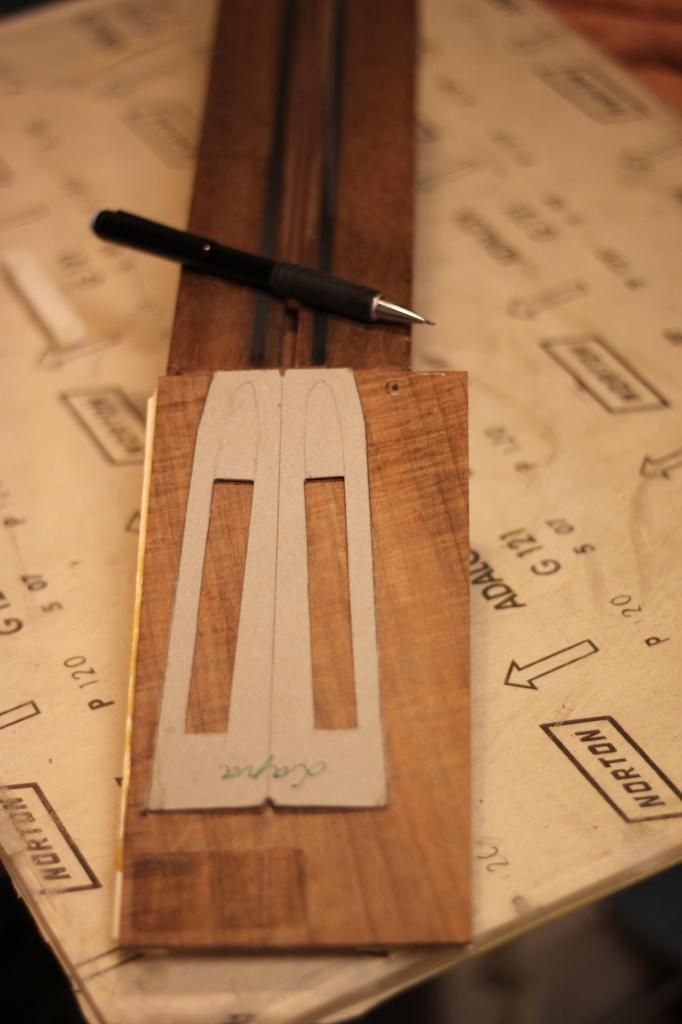
I used strong double sided tape to hold some 100grit sanding paper in place to shape the both edges of the bevel veneer
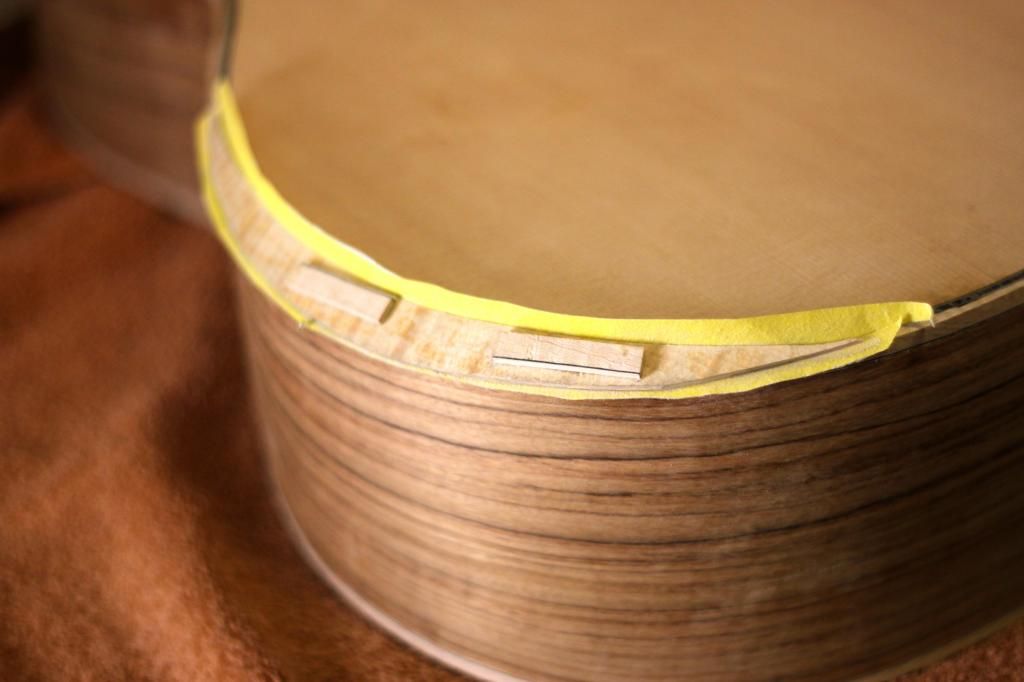
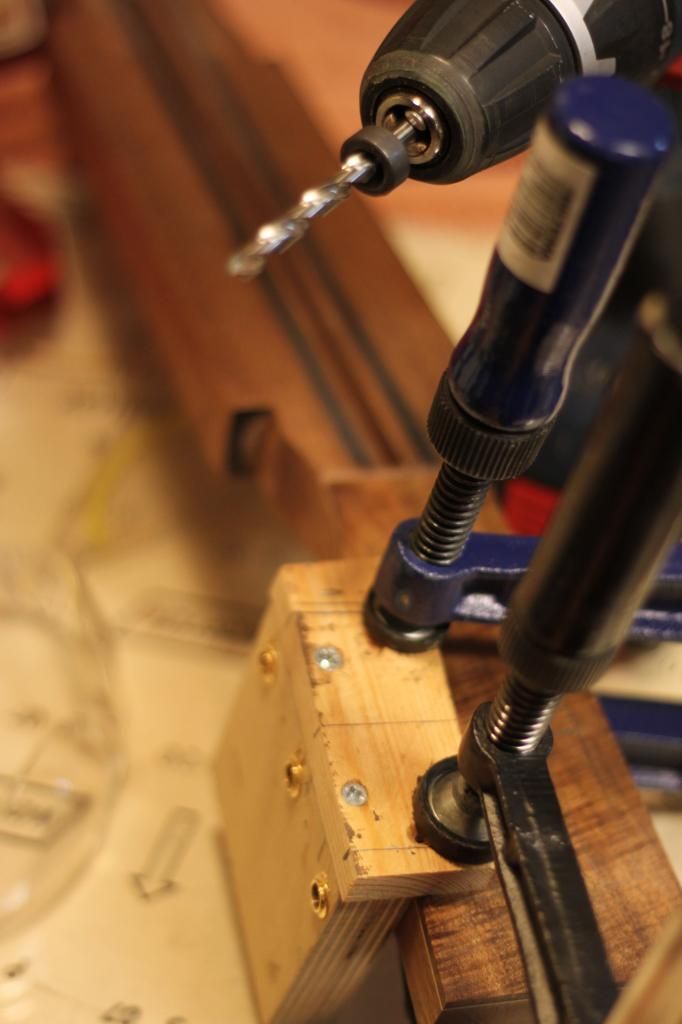
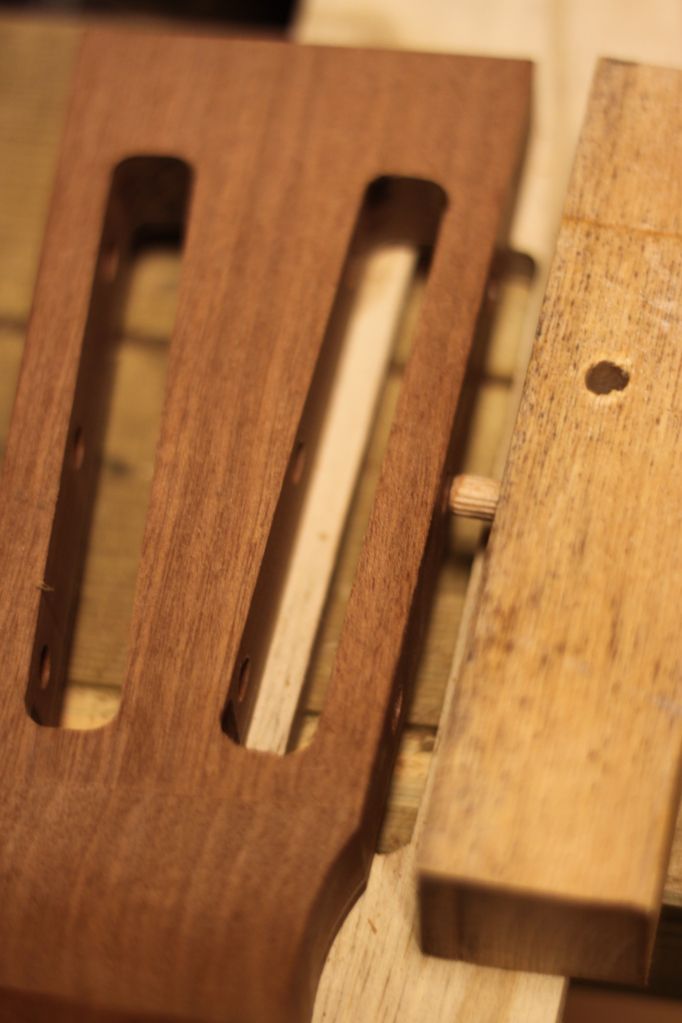
Then, using very short strokes, I sanded the veneer to the exact shape of the bevel slot. I superglued two pieces of binding as working handles to get a grip of the piece.


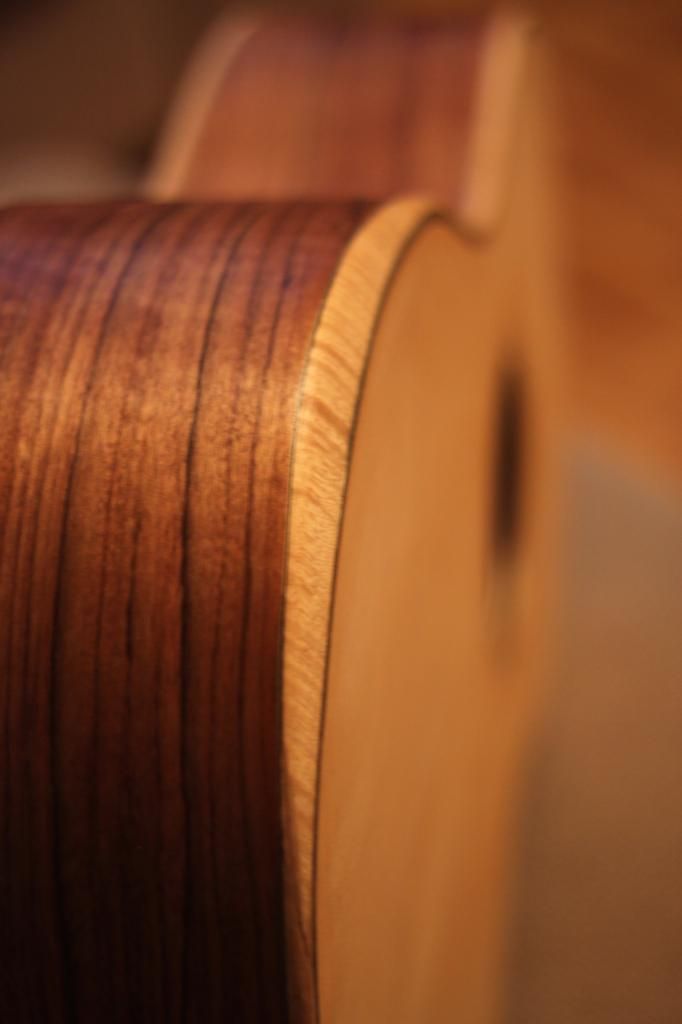
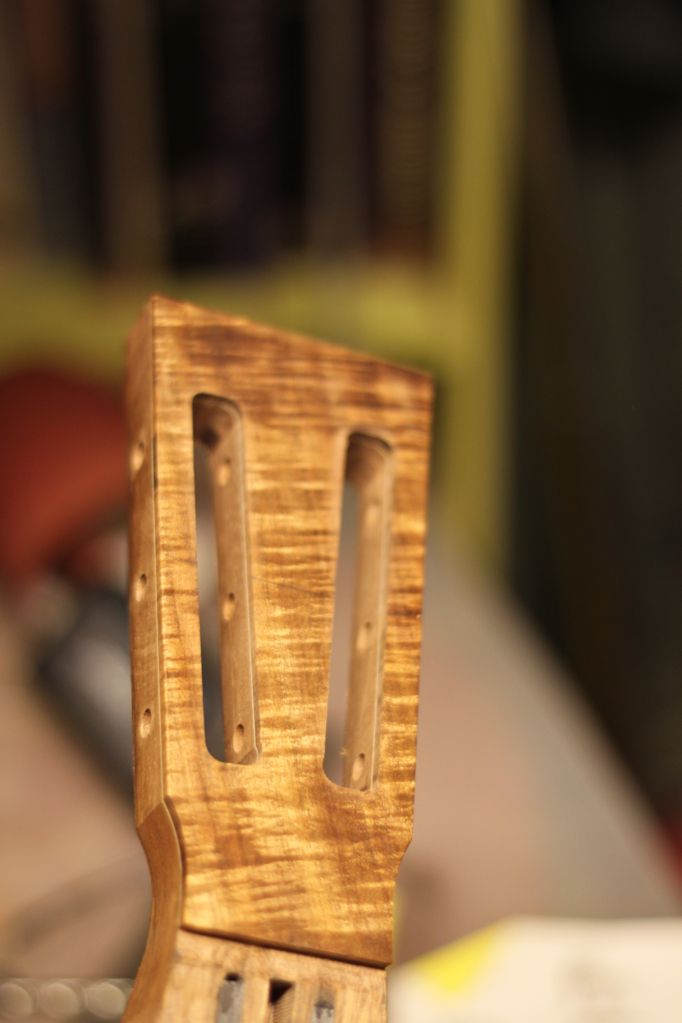
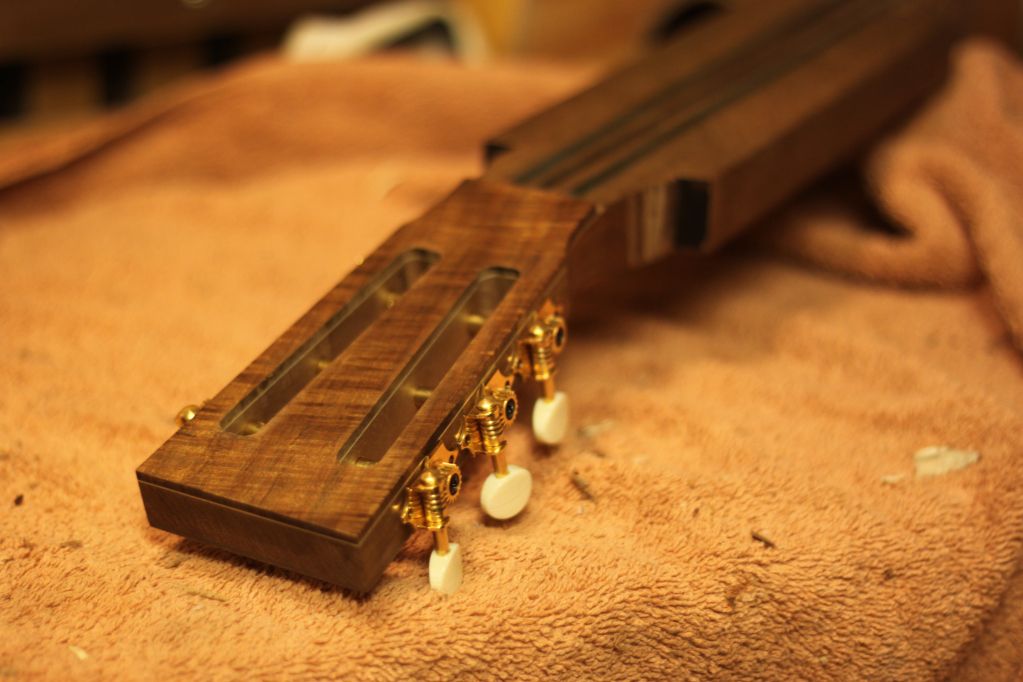
And here the thing is finally in its place, filed and sanded flush, looking good! The transition from binding to bevel is visible, but hey, who else looks at guitars this close?


perjantai 17. lokakuuta 2014

Done!

Here is a video showing the latest build aesthetics and sounds picked up by its JJB Electronics Prestige-330 pickup through Archangel X5 preamp and TC Helicon Voicelive 3. This guitar is going to be a hard one to part with, and it's been a great privilege to build!

Below some pictures of making the pyramid bridge and the finished guitar.


tiistai 7. lokakuuta 2014

lauantai 20. syyskuuta 2014

Fingerboard and finishing

Here we go again. Fingerboard, neck shaping, fretting and maybe best single phase of the building process: When the finishing gets started and the beauty of the grain revealed for the first time properly. Next week will be rubbing the French Polish finish on the soundbox and peg head veneer and Tru Oil in the neck.
Making the string ramps to the slots

Tapering the fingerboard. A little temporary fence was made out of neck blanks to keep the edge true

Time to glue down the fingerboard. The little white nails slipped into 2mm holes in both ends of the neck help keep everything in place when clamping.
Pressure! Nut blank in place helps keep the scale right
Once the fingerboard is in place, it's time to cut and sand the neck blank down to same dimensions
...and when the neck is in it's target width, the frets are hammered in and filed down to the edge

When the frets are in place it's time to shape the neck and heel

Still a few strokes to go!

first wash-coat of shellac on finish-sanded surfaces. Alreary the first wiped-on coat brings out the shine in the grain of the wood very nicely!


Quite lively grain pattern in this sapele mahogany!
Heel cap is tasmanian blackwood with black-white-black maple sandwich

East Indian Rosewood back of the headstock veneer

The only inlay on the fingerboard is off-centered brass ring with Ylämaa Spectrolite gemstone insert. They are mined from the South-East Finland. The fret material is EWO Gold from LMII. Great stuff!

sunnuntai 14. syyskuuta 2014

Working the neck

The guitar neck is a major wood work. That's what the Cumpiano book told, and I agree. Many different phases in the build, and quite a few jigs to make to get everything in place. Here are pictures of my neck process, short of fretboard, fretting and actual neck shaping. More of those hopefully tomorrow.

Stacking the heel. When the grain direction is the same
in each layer,  it's very hard to tell by a quick look that the
heel was not made of one piece with the neck

Keep 'em straight edged

Determining the neck angle with fingerboard


Copying the body-to-fingerboard angle with a
handy almost-a-straightedge-tool

The angle is copied at the neck heel...

And the disc sander table is adjusted accordingly...

…like that!

Truing the neck joint area


Jig for drilling the holes for neck attachment threaded bolts 

Don't go too deep!

Twist them in!

Deep enough to sand some curve for the joint

The same jig is used to drill holes to the soundbox

First fit!

Some tedious sanding with very short strokes and lots of down pressure required.
If the neck tilts during sanding, the joint fit is lost.

Checking the right angle

Jig to route channels for under the fretboard alignment bars

I fill these cavities with mahogany that is glued in the neck
 side and attached with screws in the guitar side.
This increases rigidity and enhances sustain remarkably.
And gets me rid of the mortice and tenon routing of the
whole neck heel length, which makes it a lot easier to fit the
neck with just sanding paper.

Routing slots for graphite bars. An extra neck blank
doubles as a fence for router.

No future twisting expected!

Threaded bolts are installed in the mahogany bars,
which are later glued to the underside of the fretboard extension.
This allows a totally glue free installation (and pain free removal) of the neck

Epoxy

Gluing on the head plate veneer with thin maple sandwich
Headstock shape
Already looking guitarish
A jig to make the tuning post holes for slot-head guitar. Don't drill too deep!
Routing the string slots with a simple jig and a guided router base
Tasmanian blackwood veneer
This is the underside of the headstock slotting jig
the center dovel centers the slot for both sides
A test run with a set of extremely bad tuners that will
never go to any guitar but look ok (former Blueridge guitar machines)

Next up: Fingerboard, fretting and neck shaping. Stay tuned, Internet!